About Me!

Hi! My name is Rachel Rothstein, and living with a nut allergy has added significant challenges in my daily life, especially when it comes to reading food labels and ensuring safety. I have often found ingredient lists to be confusing or unclear, making it difficult to make choices. I created Behind the Label to empower others with food allergies by sharing my personal journey, providing reliable information, and offering allergy-friendly recipes to assist others facing similar challenges. Thanks for visiting my blog!

  • .

    Over the past 10 years, very significant advances have been made in the field of food allergies and immunotherapy. Mainly with efforts focusing on allergen exposure orally. Oral immunotherapy (OIT) and Sublingual immunotherapy (SLIT) are the two treatments that have been most intensely studied and approved recently.

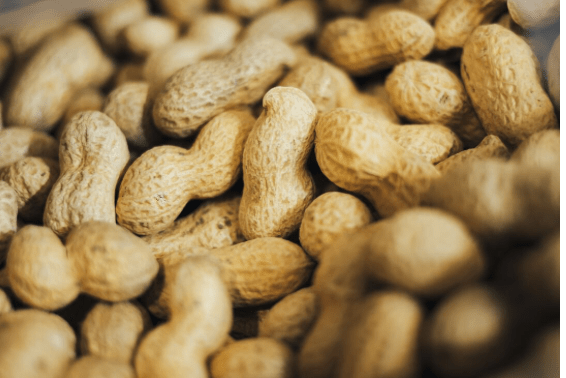
    Immunotherapy is done through ingesting, at first, very small amounts of allergenic proteins over a period of time, then gradually increasing in a doctor’s setting, to develop desensitization and eventual tolerance to the protein and allergen.  Many studies have looked at the use of OIT in milk, peanut, and egg allergies. Immunotherapy teaches the body to not react to problematic allergens.
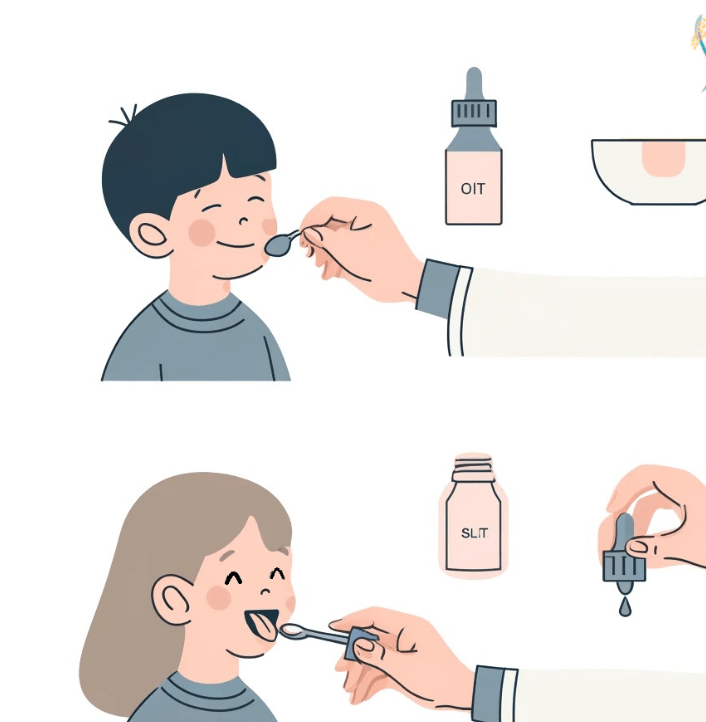
    OIT

    OIT works by carefully introducing increasing doses of a food allergen to a patient under medical supervision. Peanut, egg, and milk OIT have been shown to desensitize approximately 60 to 80% of patients studied. There are still many unknowns about OIT. The only truly accurate way to predict if someone will have a reaction to the allergen is through ingestion. OIT or SLIT should never be attempted without clinical supervision. The ultimate goal of OIT is to be able to offer the patient protection from anaphylaxis by allowing them to ingest a full serving of the allergen without any reaction. However, this newfound desensitization can be lost if the allergen is not consumed on a consistent basis. OIT is also more restrictive compared to SLIT with no exercise allowed at least 1 hour after the allergen protein was ingested.

    SLIT

    SLIT uses a different but somewhat similar approach. Instead of swallowing the allergen, patients place it under the tongue, hold for a minute, then swallow. This method uses much smaller doses than OIT but still allows for the immune system to build tolerance. SLIT is considered safer and more convenient, with fewer severe reactions reported during treatment. SLIT also allows for complete flexibility when it comes to exercise, and not many restrictions.

    While SLIT may not desensitize one’s allergies completely or as quick as OIT, many patients still experience great strides in their allergy-free journeys with these two options. For some, it could act as a security blanket and be peace of mind when it comes to accidental trace exposures. And, for others, it might be a stepping stone to potentially engaging in OIT in the future. The great news is the future is bright, especially when it comes to innovation within allergy advancements!!

  • When you think of pesto, you probably picture a classic green sauce made with basil, garlic, parmesan, pine nuts, and olive oil. But for those of us with nut allergies, this one ingredient of pine nuts is a complete dealbreaker.
    The good news? You don’t need these pine nuts to enjoy the fresh and wonderful flavor of pesto!! In this post, I’m sharing my absolute favorite nut-free pesto that is so delicious and allergy friendly.

    Ingredients

    • 3 tablespoons of sunflower seeds
    • 3 cups of basil leaves
    • 3/4 cup of grated parmesan cheese
    • 2 cloves if garlic
    • 1 teaspoon of salt
    • 1/2 cup of olive oil

    Instructions

    1. Preheat oven to 350
    2. Spread sunflower seeds on a large baking tray and bake for 5 minutes then let cool
    3. In a blender or food processor, add basil, Parmesan cheese, garlic, and salt then pulse untill a paste is formed
    4. Once the paste is formed, add in the sunflower seeds and pulse again
    5. Then add in the olive oil and pulse again untill smooth
    6. Cook your pasta, mix with the pesto, and sprinkle with parmesean cheese on top if desired
    7. ENJOY!!!
  • As a hugeee fan of Gossip Girl, I’ve always been obsessed with everything Upper East Side: Chanel headbands, dramatic entrances, and, of course, French desserts. Blair Waldorf lived off of macarons while plotting her next move, and I so desperately wanted to try this amazing looking dessert.

    But there was just one problem.. my nut allergy. Traditional French macarons are made with almond flour, so that meant macarons were completely off-limits. So I took matters into my own hands.

    I started experimenting with nut-free alternatives, reading tons of recipes, and testing batches. Eventually, I found and created the best version of Nut-Free French macarons that are absolutely delicious—Blair Waldorf would definitely approve.

    In this recipe, I am sharing 4 different flavors of French macarons: Red Velvet, Chocolate, Cookies and Cream, and Birthday Cake. All of the flavors but Chocolate and Red Velvet share the same base recipe.

    I hope you enjoy them as much as I did!!!

    Ingredients:

    For the base layer cookie:

    • 2 egg whites
    • 4 tablespoons + 1/2 teaspoon granulated sugar
    • 1/2 cup flour
    • 1/2 cup powdered sugar
    • 1/2 teaspoon vanilla extract
    • Food coloring if desired

    For the chocolate base layer cookie:

    • 2 egg whites
    • 4 tablespoons + 1/2 teaspoon granulated sugar
    • 1/4 cup flour
    • 1/4 cup cocoa powder
    • 1/2 cup powdered sugar
    • 1/2 teaspoon vanilla extract

    Base layer cookie Instructions

    1. In a large bowl with a standmixer/hand mixer, beat the egg whites until frothy.
    2. Add granulated sugar into egg mixture and beat until stiff peaks form
    3. In another bowl whisk the flour and powdered sugar together
    4. Then sift the flour and powdered sugar micture into the egg white mixture
    5. Add the vanilla extract and any desired food coloring depending on flavor macaroon you are making or if desired
    6. Gently fold all of the ingredients together
    7. transfer this batter into a piping bag with a round tip
    8. Pipe the macarons onto a baking sheet in 1.5-2 inch diameter circles
    9. Then tap the baking sheet on a flat surface a few times to release any air bubbles
    10. Let the macarons sit at room temperature for 45 minutes
    11. Preheat the oven to 280 F
    12. Bake the macaroons for 17-20 minutes
    13. Let macarons cool for 10 minutes then move to a cooling rack

    Now for the fun part!!! The fillings:

    Birthday cake macaron filling ingredients and instructions

    Instructions

    For filling:

    • 4 tablespoons unsalted butter, softened
    • 3 tablespoons yellow cake mix
    • 1 cup powdered sugar
    • 1 tablespoon heavy cream
    • Rainbow sprinkles
    • Pink food coloring
    1. In a bowl with a hand mixer, beat the butter untill creamy and soft
    2. Add the cake mix to the butter mixture and half the powdered sugar, then beat untill fully combined
    3. Add the rest of the powdered sugar and beat on medium for 5-6 minutes
    4. Add heavy cream and then mix untill fully combined

    For cookies:

    • Once the beginning base layer cookie recipe is made and piped, sprinkle on top sprinkles before placed in oven and then bake

    Cookies and Cream Macaron filling ingredients and instructions

    • 3/4 cup unsalted butter, softened
    • 2 1/2 cup powdered sugar
    • 2 tablespoons heavy cream
    • 1/4 teaspoon salt
    • 1 teaspoon vanilla extract
    • 3/4 oreos, crumbled up fine

    Instructions

    1. Beat softened butter untill fluffy, about 4 minutes
    2. Add powdered sugar, heavy cream, salt, and vanilla, then beat to combine
    3. Add the crumbled Oreos and beat on low to combine

    For cookies:

    • Once the beginning base layer cookie recipe is made and piped, sprinkle on top the oreos before placed in oven and then bake

    Red Velvet filling ingredients and instructions

    • 1/4 cup cream cheese, room temperature
    • 1 teaspoon vanilla extract
    • 1/8 teaspoon of salt
    • 1 cup of powdered sugar
    • Red food coloring

    Instructions

    1. Beat theecream cheese on a medium speed for 1-2 minutes with a whisk attachment until smooth.
    2. Mix in vanilla extract and salt on a low speed.
    3. Then slowly mix in powdered sugar on a low speed.
    4. Continue to mix on low for a couple of minutes until the ingredients are fully incorporated

    Chocolate filling ingredients and instructions

    • 1/4 cup heavy cream
    • 1/3 cup chocolate chips
    • 1/2 teaspoon vanilla
    • 1/8 teaspoon salt

    Instructions

    1. Place all the ingredients into a bowl then microwave for one minute
    2. Let sit for 5 minutes then whisk until smooth
    3. Heat for another 15 seconds if not fully melted
    4. Place into the fridge for 20 minutes then whisk until smooth

    Assembly for ALL

    1. Lay half of the macaron cookies flat side up on a baking sheet.
    2. Pipe a small cherry-sized amount of buttercream in the center of one shell.
    3. Top that shell with the other shell and gently press just enough to push the filling out to the edges.
    4. Do this for all the macaron shells until done.
    5. Once filled, macarons can be refrigerated in an airtight container for up to three days.
    6. ENJOY!!!
  • Traveling can be EXTRA turbulent for those with food allergies – physically, emotionally, and logistically.

    I personally love to travel. Whether it’s skiing in snowy Utah, lounging on a beach in sunny Florida, exploring a fast-paced city like NYC, or wandering the cobblestone streets of Italy, the excitement of new places always calls to me. But while most travelers worry about delays, traffic, or weather, those with food allergies face a unique and often invisible layer of stress that can feel so overwhelming.

    The idea of being 30,000 feet up in the air with limited access to medical care, unfamiliar food, and unpredictable environment can make even short flights feel like major risks. I remember a time when I wouldn’t eat anything on a flight out of my such extreme fear. In my mind, being 30,000 feet in the air meant fewer resources, no nearby hospital, and far too many “what ifs.” It didn’t feel worth it.

    But here’s the truth: traveling IS possible for those with food allergies. With the right preparation and advocacy, you can feel safe, calm, and confident wherever your journey takes you. Here are a few great strategies that have made all the difference for me:

    1. Packing allergy safe food/snacks

        Most in-flight meals, or complimentary snacks, don’t come with full ingredient lists, and cross-contamination risks can be high. That’s why I always bring my own food, things that I know are definitly safe. Whether it be a bagel or sandwich, chips, fruit, or allergy-safe snacks, it give me peace of mind and allows me to enjoy the flight without worry.

        2. Notify the Airline About Food Allergies when first Booking and at the Gate. 

        When booking, always note your food allergies and follow up at check-in. I’ve often been allowed to pre-board so I can wipe down my seat and settle in the seat stress-free. Letting the gate agents and flight attendants know ahead of time ensures they’re aware and can follow allergy protocols. They also most times notify those 2 rows ahead and behind you to not eat any nut products which adds as a huge stress-relief to my flight experience.

        3. Always carry Epi-pens in your carry-on/backpack

        I like to bring 2 separate epipens, for a total of four devices total. One in my carry on bag so its always accessible on the plane and the other in the suitcase just in case one is lost or a specific situation was to occur.  That way if you lose a set while you’re traveling you always have a spare back in your hotel room and there is no need for extra stress.

        4. Clean Your Area
        When you board the plane, wipe down your seat, tray table, armrests, window, TV, remote, and anything else you might touch with disinfectant wipes. Don’t forget the seatbelt buckle and the buttons above your head. Keep lots of wipes on hand so you can wipe before eating and after moving around the cabin.

        5. Remember that flying with food allergies is doable!

        I know personally that especially when experiencing an allergy, flying on airplane about to embark on an extremely relaxing vacation you’ve been looking forward to, and is not a stressor for anyone else, seems extremely scary or overwhelming. But here’s the truth, it’s doable!! With the right preparation and mindset.

        So next time you board an airplane or buy that ticket for your next vacation, don’t think of it as a gamble, or game of roulette. Instead, think of it as an opportunity, one where you’re fully prepared, fully capable, and ready to enjoy and experience the world!!!

      1. Growing up in Florida and having family in New York, I always visited many bagel shops and bakeries, seeing the amazing, delicous-looking Italian rainbow cookie. Looking all vibrant and pretty with the green, yellow, and red layers topped with chocolate, only to soon find out it was made with almonds, a nightmare for a nut-free kid like me. As I got older and discovered my love for baking, I decided to take matters into my own hands and create this dessert I’ve always wanted to try, but make it in a safe, nut-free way that my brother and I, being nut-free, could actually eat. I want to share this recipe and pictures with all of you to try, and hope you guys will enjoy it as much as I did!!!

        Ingredients

        • 1 cup of white sugar
        • 4 eggs
        • 1 cup of unsalted butter, melted
        • 1 cupp of all-purpose flour
        • 1 cup of semi-sweet chocolate chips
        • 1 tablespoon of vegetable oil
        • Raspberry jam
        • Red, yellow, and green food coloring

        Instructions

        1. Preheat the oven to 350 degrees F
        2. Whisk the eggs and sugar together untill about tripled in size
        3. Fold in the sifted flour and melted butter untill combined
        4. Divide this batter into 3 bowls and add each food coloring color seperatley
        5. Pour each batter into 3 8×8 inch pans which are greased, and bake until lightly golden brown along the edges. About 8-10 minutes.
        6. Once cooled, remove each cookie from the pans and spread each with a thin layer of jam in between starting with green on the bottom, yellow in the middle, then red on top.
        7. Melt the chocolate and oil, then mix together and pour over the top layer of the cookies and spread until even. You can also create ridges with a fork for a design on top of the chocolate if desired.
        8. Chill in the fridge until the chocolate has set, then cut into 1×2-inch rectangles and serve.

        Enjoy!!!

      2. The word EpiPen is short for epinephrine and is the drug form of adrenaline. Adrenaline is key and saves lives when an allergic reaction occurs, as your body goes into anaphylaxis and “fight or flight” mode.

        Anaphylaxis sounds daunting. It is the name of the severe, potentially life-threatening allergic reaction that can occur rapidly. It involves the sudden release of chemicals from the immune system that can cause many symptoms, including difficulty breathing, a drop in blood pressure, and a rash. Food Allergy Research and Education (FARE) says, “Anaphylaxis often begins within minutes after a person eats a problem food. Less commonly, symptoms may begin hours later.”

        The EpiPen works by counteracting the effects of the anaphylactic allergic reaction. The adrenaline helps open airways, raises blood pressure, and reduces swelling.

        My Personal EpiPen Journey

        Before, the idea of using an EpiPen terrified me. I hated shots. I hated the sight of needles. I hated giving blood and IVs. The sheer thought of stabbing an EpiPen into my own leg during an emergency made my stomach knot. In my head, the EpiPen was this huge, long, gigantic needle. Just another scary part of having allergies of course.

        But here’s what I learned, most of that fear wasn’t really about the needle. It was about the reaction. The loss of control, the panic, and the symptoms I would possibly feel. Once I understood that the EpiPen wasn’t the scary part, but actually my way out and the thing that would save me, something shifted.

        I started to educate myself. I practiced with countless EpiPen trainers to make sure I was prepared, constantly reminding myself that this device is here to help me, not to hurt me.

        Now, I see the EpiPen not as something scary, but as a tool that gives me the ability to take control of my allergy and save my life, not the other way around. So, while I still don’t love needles, I now do know what to do. And that knowledge makes all the difference. Think of it like a quicker, smaller flu shot, just a few seconds of discomfort that can and will save your life.

        History of the EpiPen

        In 1987, the FDA approved the EpiPen. For a long time, it was the only epinephrine auto-injector available. But technology is always evolving, and so are the ways we can respond to anaphylaxis. Today, there are multiple FDA-approved options to choose from:

        1. Generic EpiPens

          The EpiPen we all know and love. These versions of the epipen are FDA-approved and contain the same active ingredient (epinephrine) that saves lives and are significantly more affordable. They’ve helped reduce financial barriers and made access to life-saving medication more possible for families, schools, and individuals.

          Generic Epi-Pen

          2. Auvi-Q

          Auvi-Q is a compact, pocket-sized auto-injector that gives step-by-step voice instructions during an emergency. This feature is great for people who might panic or have never used one before. It’s easy to carry and simple to use.

          Auvi-Q

          3. Neffy

          Neffy is a new, needle-free epinephrine nasal spray that was recently FDA approved. It represents a major step forward in allergy treatment, especially for those who are scared of needles, especially young children and infants. Just one quick spray, and the medicine goes to work.

          Neffy

          All in all, whether you choose a brand-name EpiPen like Auvi-Q or a generic version, these medications all serve the same purpose, to treat an allergic reaction effectively, and save your life. So, the most important thing isn’t which device you carry, it is that you actually do carry one, know how to use it, and feel confident using it!

        1. I am allergic to nuts, and when I was younger in elementary school, I never really understood the sheer extent to how serious and life threatening food allergies were.  I always thought that I just couldn’t eat certain foods, and that was it. But, as I got older and started to learn more about their severity and how to properly use an EPI-PEN, I started to deal with and control these allergies and fears differently. My perspective shifted, and I began to get very scared whenever it came to food. I started to eat at only a few restaurants that I had been to before and knew were safe. I also only ordered the simplest thing possible at a restaurant that I knew had to be nut-free, such as pasta with butter. I would not eat others’ homemade goods. And I especially would not try any new foods or ingredients as I was scared and constantly worried about having any potential allergic reaction. I was stuck in a constant cycle of what-ifs. “What if this had nuts?” “What if I had an allergic reaction?” “What if the server did not hear me?” “What if something went wrong?” I remember going to Playa Bowls, trying an acai bowl for the first time. However, I was extremely reluctant to eat this and put this off for 5 years, not trying an acai bowl until recently. This was because I thought, “What if I had a reaction to acai, the fruit I had never had before?” In reality, I thought this was not just for acai, but for every single new thing coming my way. For example, matcha as well, although it had nothing to do with nuts or was even in the same family. I was suffering from a severe case of the “what-ifs,” most would call it.

          While, yes, I do still have this food anxiety today, accompanied by “what-ifs,” and it did not fully go away, I did learn how to manage it. Here are a few of these tips.

          1. Distractions

          One tip I have learned is to distract myself, whether it be with friends or family, for at least 30 minutes after trying a new food. This is so that I was not thinking about potential consequences of reactions, or freaking myself out so much that I would mimic these same allergic reaction symptoms from my anxiety and fears alone, not because of the actual food. I realized that distracting yourself by especially thinking about something that makes you happy or is entertaining to you, whether it’s sports, watching a TV show, listening to music, or a new movie, can be a huge game changer..

          1. “So what?”

          By saying this simple phrase, “So what?” In response to when these fearful, anxious thoughts creep up, I realized and began to reason about the possible responses. I came to the conclusion that “I’ve eaten here a million times before and been totally fine”, or “So what if it’s new?”I have my EpiPen, and  know exactly how to respond.” This phrase really helps me break this cycle of fear and puts things into perspective. It reminds me that while my allergy is real, I don’t have to let it control every experience and my life. I am prepared, I am careful, and I am capable of handling whatever comes my way, even if it is a reaction, just like I know you are too.

          1. Talk to someone you trust

          Whenever faced with an anxious panic, reach out to a friend, family member, or someone who “gets it” and may even have an allergy. Potentially saying things such as “Hey, I’m feeling anxious after trying a new food, can you talk for a second?” works wonders. Also, even just hearing someone say, “You’re okay, and you’ve eaten this before,” or just talking you through it can make a huge difference. Sometimes, especially just hearing a calming voice and a fresh perspective from someone outside of the dinner table, is all it takes to start calming down and really improve your food anxiety.

          All in all, with the right mindset, tips, and support from the people around you, you can learn to manage both the actual allergy and the “what if” anxiety that comes with having a food allergy. We are all still learning every day, and that’s okay. Be proud of how far you’ve come, and know that every small step, whether it be just trying a new food, saying “so what,” or just reaching out to someone, is truly a big win. I hope these tips help you feel more confident, more supported, and most of all more free when it comes to food.

        2. Hi! My name is Rachel Rothstein, and living with a nut allergy has added significant challenges in my daily life, particularly when it comes to reading food labels and ensuring safety. I have often found ingredient lists to be confusing or unclear, making it difficult to make choices. I created Behind the Label to share my personal journey, provide reliable information, and offer allergy friendly recipes to assist others facing similar challenges. This blog aims to empower individuals with food allergies by fostering a better understanding of product labeling and promoting safe, enjoyable eating experiences.